Neck Turning Tools
Before we can begin neck turning, we’ll first need to have the right tools for the job.
There are many good neck turning tools on the market. I have owned and had superb results with Sinclair, Nielsen and K&M. There are many others that can be expected to produce extremely uniform case neck thickness.
I own one neck turning tool that produced less than excellent results. It’s the style that adapts a case trimmer for neck turning and it didn’t produce the kind of neck thickness uniformity I wanted.
An important feature to consider, is the ease of cutting depth adjustment. I settled on the K&M turner many years ago largely because it is so easy to adjust to a very specific cutting depth, “to the tenth”. If you really want a neck thickness of say, .0125, not .0124 and not .0126, but .0125, I found the K&M tool the easiest to get to precisely the cutting depth I wanted. It has a secondary, compound adjustment feature, that makes sneaking up on a very precise cutting depth easy.
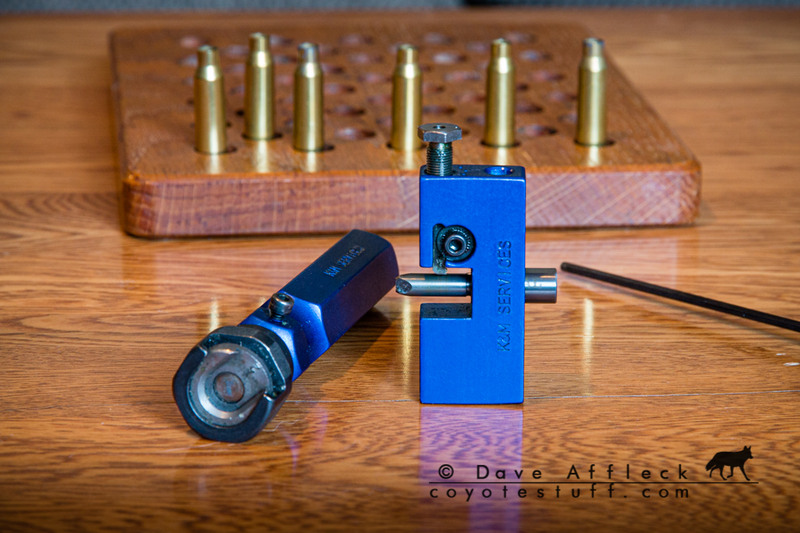
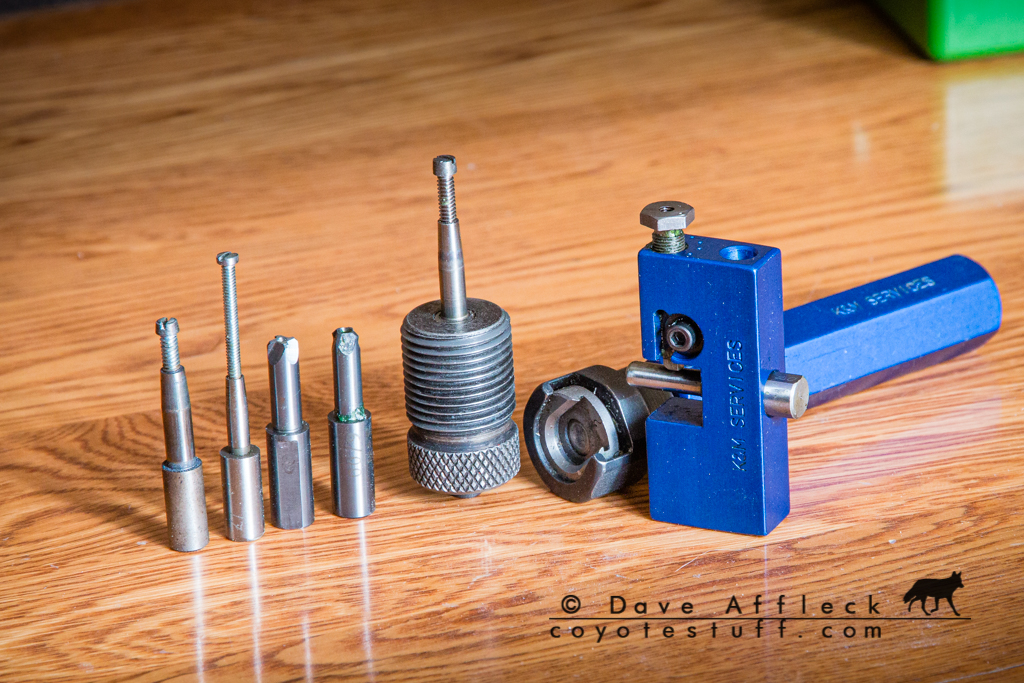
No matter which tool you choose, I recommend that if the maker offers an option for carbide turning mandrels that you pay up for the carbide. The carbide resists brass buildup, or galling, better than the tool steel mandrels.
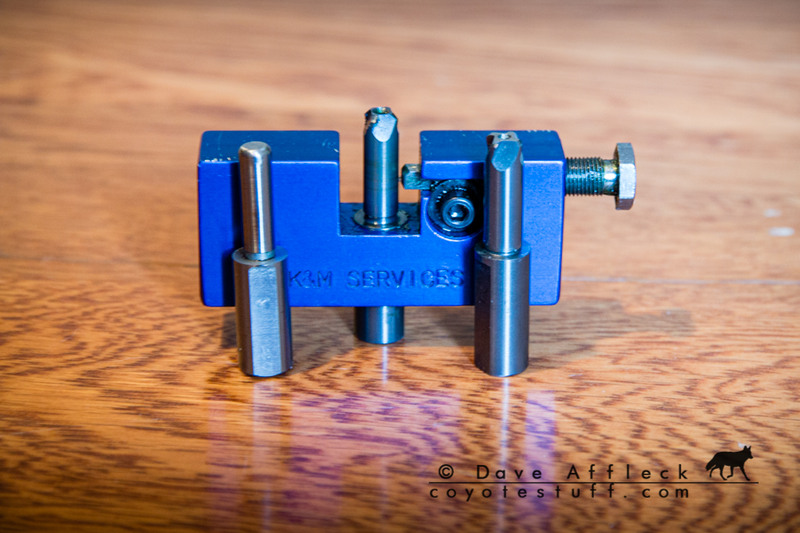
Do also be sure to get expanding mandrels to go with the turning tool. One of the more important aspects of the neck turning operation for getting consistent results, is the fit of the case neck on the cutting tool mandrel. It needs to be as close a fit as possible, but without being too tight which causes galling and makes the operation more difficult in general. A loose, sloppy fit will lead to less than perfectly uniform case necks, which is exactly the opposite of what we want to accomplish.

Power Neck Turning
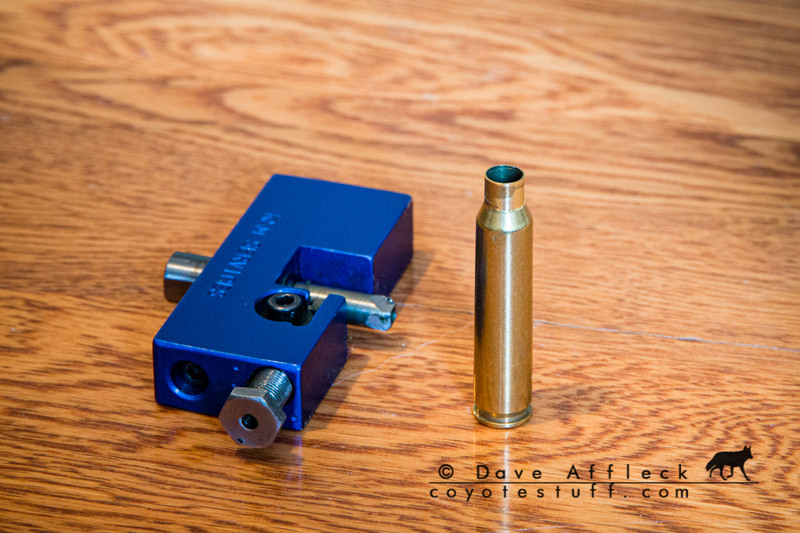
Another consideration in tool choice are the options for powering the operation. Nearly all quality neck turning tools are going to have some way of using something like a power screwdriver or drill to turn either the case or the cutter to reduce effort and speed up the operation. This is another reason I settled on the K&M many years ago.
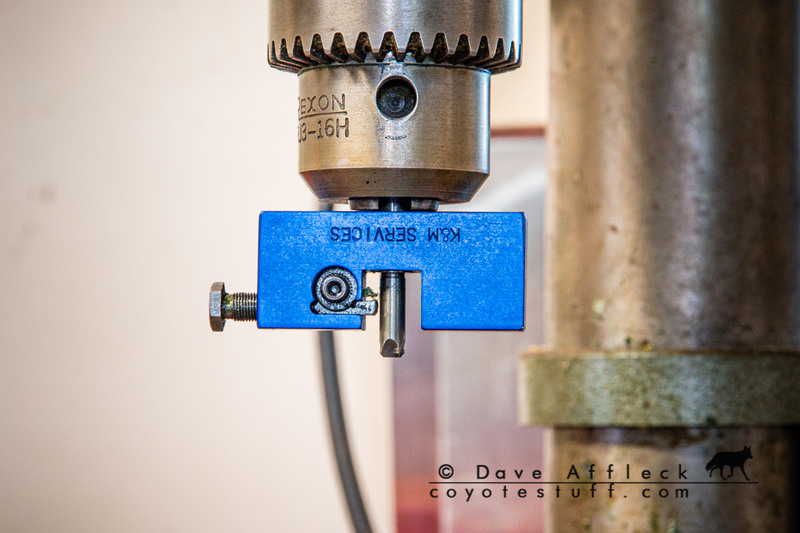
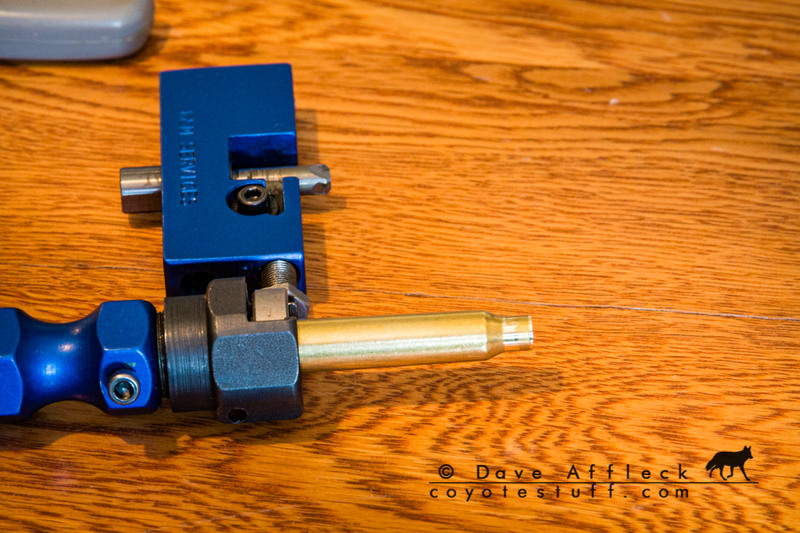
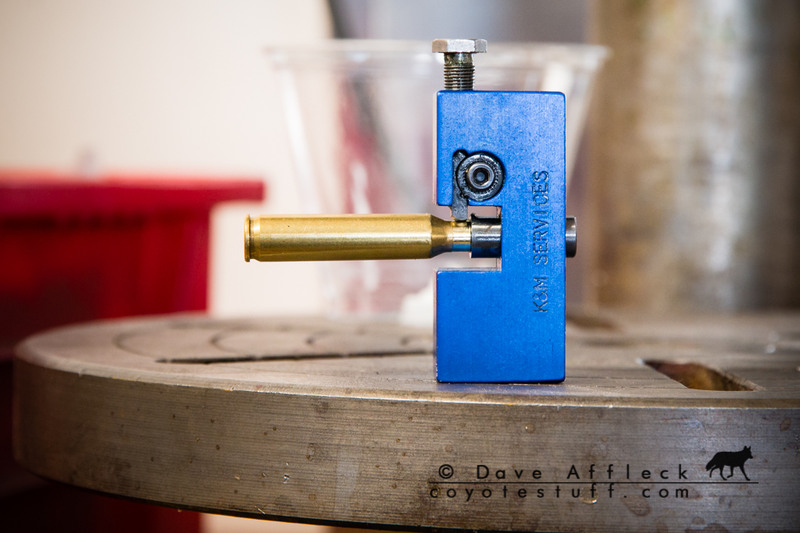
The method I use to power the K&M neck turning tool is not recommended by the manufacturer, but it has worked extremely well for me for a long time. The cutter mandrel protrudes from the back of the cutting tool far enough to allow chucking the tool in a drill press as shown below.
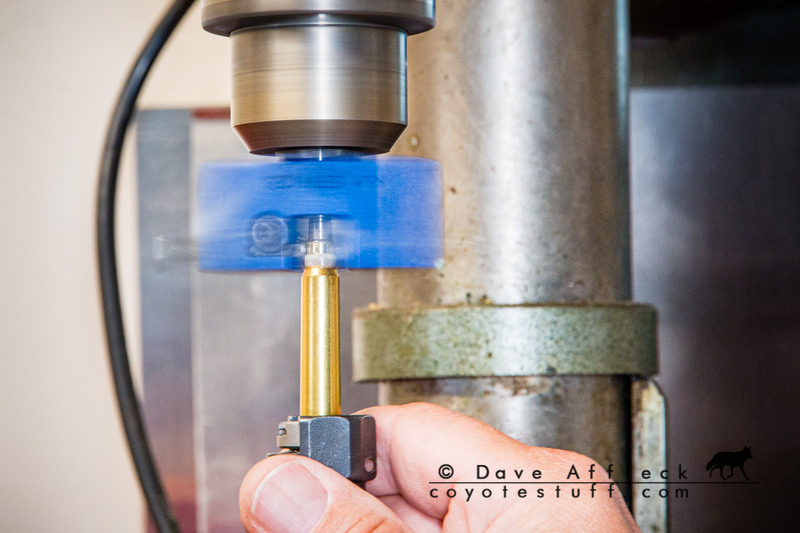
I then use the drill press to turn the tool while I feed the cases up onto the mandrel. My drill press only goes down to 500 RPM at its slowest speed, which is a good bit faster than recommended. But, it works very, very well, turning cases very quickly and easily and producing a very smooth fine finish on the turned necks.
Angles
One more item to think about when ordering a neck turning tool is the relief angle of the cutter. You’ll want cutters with angles to match the shoulder angle of the cases you’ll be turning. More on this when we talk about the dreaded doughnut.
Measuring Neck Thickness
You’ll need the proper tools to measure neck thickness accurately.
For quickly evaluating or culling a lot of brass, something with a dial indicator like this Sinclair neck thickness gauge works well.
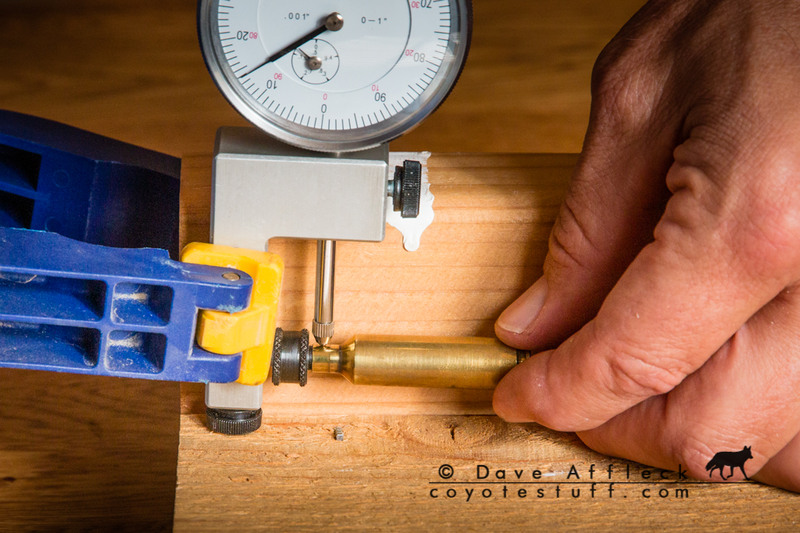
But while that is fine for sorting, it doesn’t have enough precision for really critical inspection of neck thickness for our purposes. And while you might be tempted to use a caliper, I don’t consider the caliper adequate for the task either.
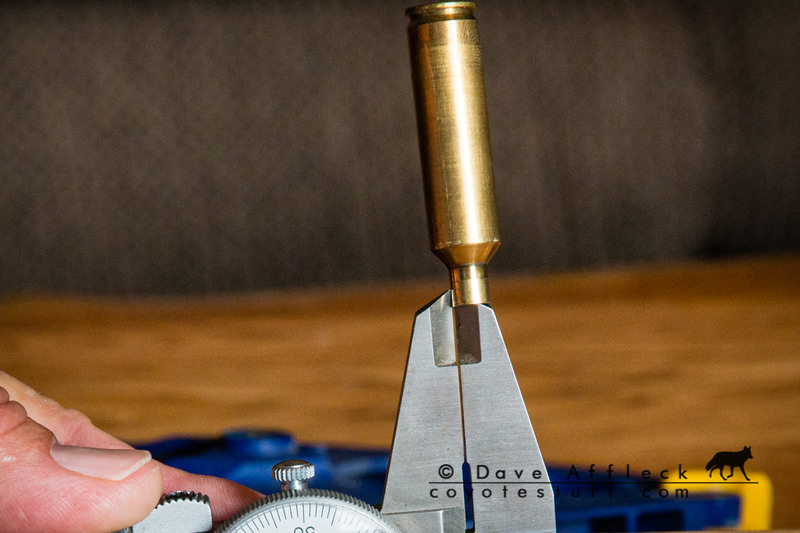
The proper tool for measuring neck thickness is a ten thousandth reading tubing micrometer as shown below.
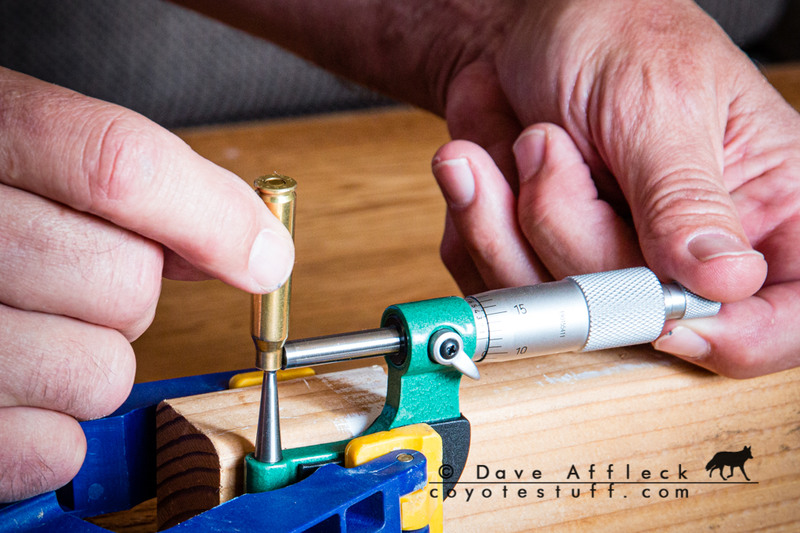
Note though, most tubing mics won’t accommodate a .17 caliber. The ball on the anvil is too big.
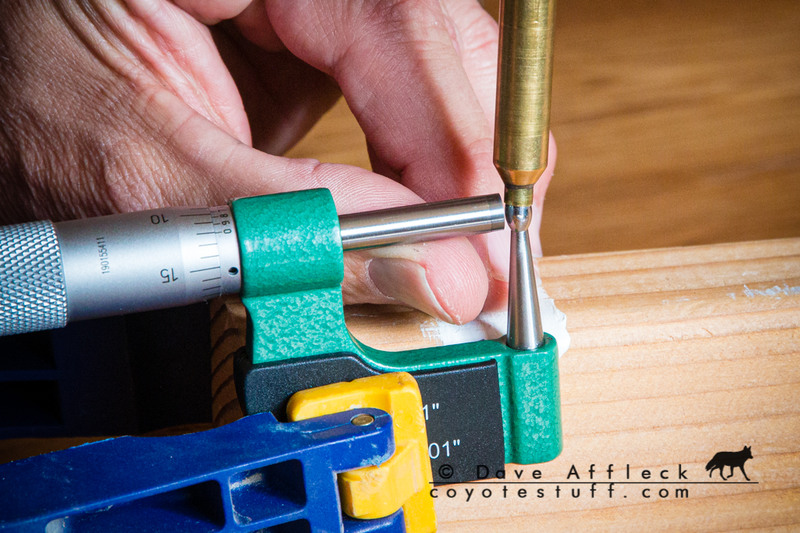
But while a ball mic is undoubtedly the best measuring tool for the job, it isn’t really necessary to have one. That’s because the really critical dimension in all this is the final loaded round neck outside diameter. That’s what you really need to know for fitting a tight neck chamber and is also the dimension you’ll need for choosing a sizing bushing. So, if you can only have one measuring tool for neck turning, a ten thousandth reading outside micrometer is a good choice.
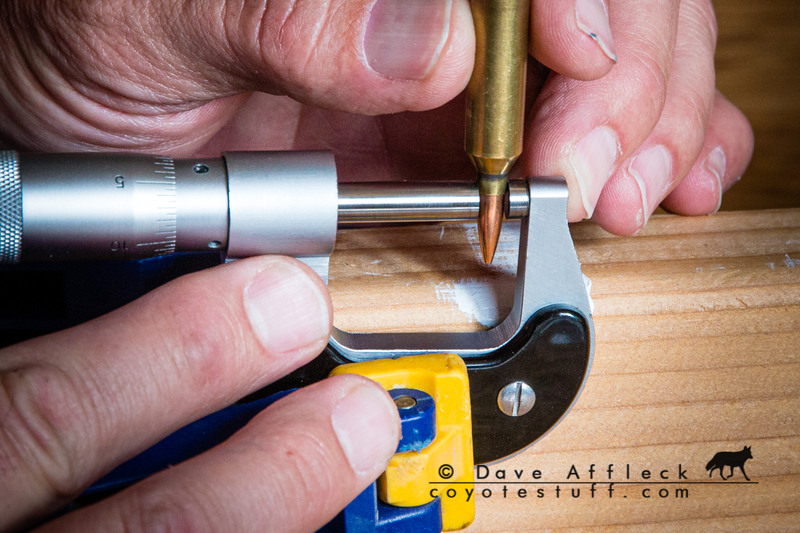
You can accurately determine neck thickness with just the outside micrometer, too. Simply measure outside diameter of a loaded round, measure the bullet, subtract the bullet from the outside diameter and finally divide by two to get neck thickness.
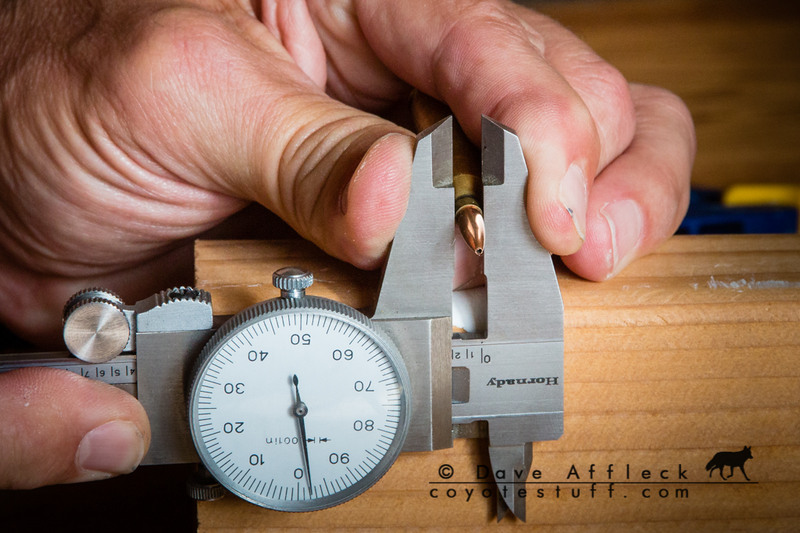
And again, while you may be tempted to get along with just a caliper for this job, it really isn’t accurate enough, in my opinion.
Wildcat? Neck Down First
If you are going to neck turn for a wildcat that requires necking down the brass, you are better off neck turning after the brass has been necked down, rather than before. For one thing, the necking down operation has the potential to move some brass around and create non uniform neck thickness. Best to get that out of the way before making them perfectly uniform.
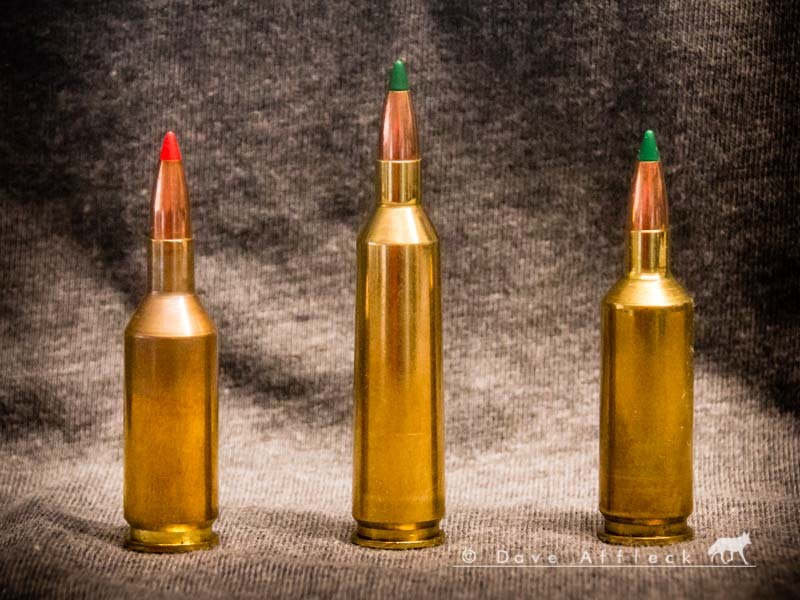
And also, the really critical dimension in all this is the outside neck diameter of a loaded round. You can’t measure that until after necking down.

And lastly, the neck shoulder junction is going to move when necking down – it’s easier to avoid doughnuts by neck turning after that has happened.
There are times when it might be necessary to remove some neck thickness before necking down. But in those situations, it’s best to use an inside reamer and to leave enough thickness to allow neck turning to final o.d. After necking down.
Case Neck Turning Step By Step
Now that we have our tools assembled, we can walk through case neck turning step by step.
Size
You’ll want to size the necks before beginning. We want them nice and round with all the dings and dents ironed out before we start.
Trim
Depending on your neck turning tool and how you choose to limit how far the case can advance onto the cutter, it will be critical that all of your cases are exactly the same length. The way I actually do it, case length doesn’t matter, so I usually skip trimming at this point.
Sort Brass
If you haven’t already sorted and culled your brass, now is a good time to do it. You’ll want a few scrap cases for setting up the cutting depth adjustment of the tool and culls are perfect for this.

Determine Starting O.D.
You’ll want to know where you are starting and how much brass you are removing as you go. So before starting to turn cases, seat bullets in a couple of the culls and measure the outside neck diameter of the unturned cases. This is your starting O.D.

Expand
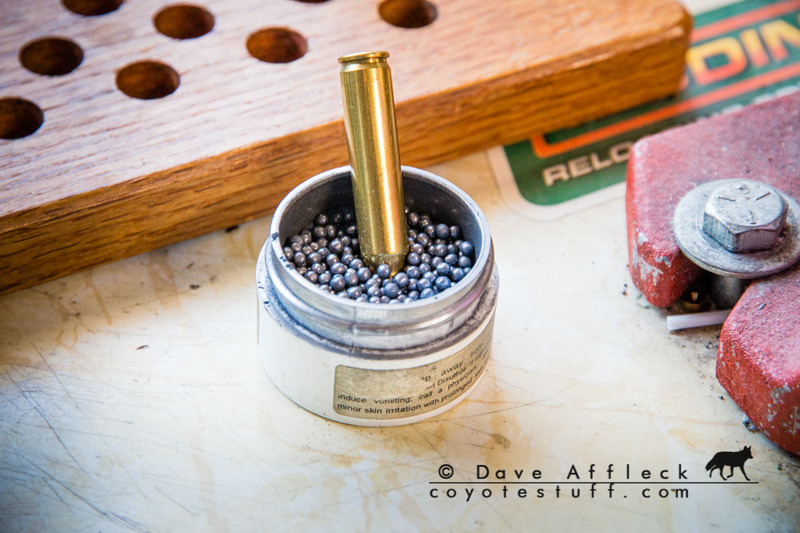
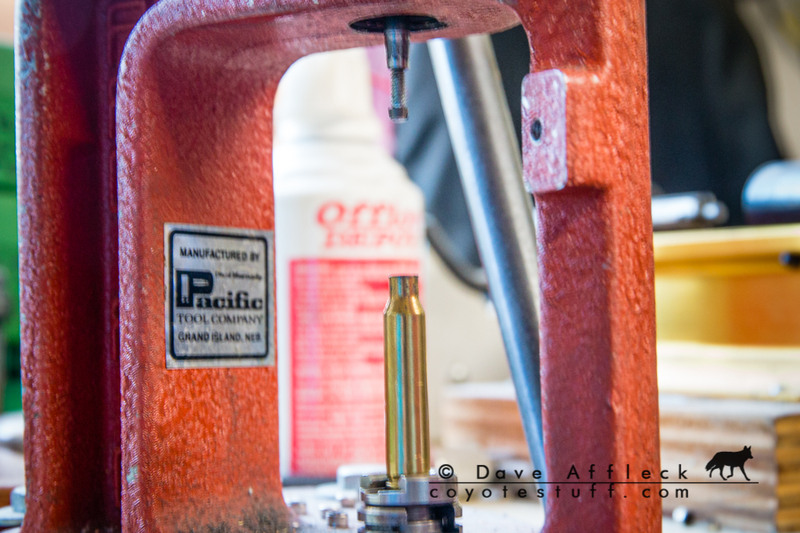
Use the expander mandrel that came with your neck turning tool to make sure your case necks will have a good fit on the turning mandrel. Besides assuring a good fit, this step will make the inside of the neck nice and round and transfer irregularities to the outside where they’ll be removed in the neck turning operation.
You’ll need to lube either the mandrel or the inside of the necks. I find moly powder excellent for this. Imperial sizing wax is another good choice.
Determine Finished O.D./Neck Thickness
For a Tight Neck Chamber
What thickness to turn the necks to, or put another way how deep of a cut to make, depends on the chamber and just what you are trying to accomplish. If it’s a tight neck chamber – a chamber with a neck diameter smaller than the outside diameter of a loaded, un-turned neck, then obviously, you’ll need to turn them at least thin enough to allow the round to chamber.
The question then becomes how much clearance do you want to leave. I turn all my brass for my tight neck chambers for .0015 total radial clearance (or .00075 “per side”). I’ve never once had any problems in the field using brass with that much clearance. And I also think that it is “tight enough” to get all the accuracy advantage I seek out of the tight neck chamber. For someone new to all this, who might be feeling a bit shy about cutting things too close, I don’t see anything in the world wrong with .002 total clearance. I personally also think that .003 is pretty sloppy and works the brass more than needs to be for a tight neck, so I’d advise trying to keep the clearance less than that.
What I do when specifying a custom tight neck chamber, is to have the brass in hand before starting the rifle project. I like to have enough good brass, from one lot #, to wear out a barrel before beginning a custom rifle project. I’ll take a piece of brass and set the cutter to take about .001 off all the way around. Any cases that don’t get cleaned up close to 100% with this cut are culls. Then with a couple of the freshly (but lightly) turned cases I’ll seat bullets to my desired seating depth. Then measure the outside diameter of the neck with a bullet seated. Then order my custom tight neck chamber to be about .0015 bigger than that.
By neck turning the entire batch, enough to wear out the barrel, at one time, I’m assured of consistent neck thickness and neck tension for the life of the barrel. Remember, neck turning is a one time operation, you only need to to it once for the life of the brass.
For a Factory Chamber
Now, for the guys wanting to neck turn for chambers that are not tight necks, be they factory or custom, the question of what thickness to turn to is a bit more muddy. Obviously, you don’t “need” to neck turn at all, for a factory or non-tight neck chamber. And of course, factory chambers are generously proportioned and sloppy of fit to begin with, so there is always concern for making things even sloppier.
Most of the advice I have ever read says to make your cuts to “clean up” about 75% of the neck. With the reason given for not cleaning them up 100%, being that since it isn’t a tight neck, you don’t want to make the clearance any larger/sloppier than you have to. And that’s fine.
But, I take a different approach. I setup the tooling so that my cuts will clean up the necks 100%, even for my factory chambers. My thinking, is that if I’m going to the trouble of neck turning, I’m going to go “all the way”. There IS a caveat here though. I don’t make cuts any deeper than about .0015 for a non-tight neck chamber. Especially with typical domestic brass (Win., Fed. etc.), that usually will not clean up all the cases 100%. But, the ones that can’t be cleaned up close to 100% by a .0015 cut, I cull out and toss in the sh*t-pile. Like I said, if I’m going to the trouble to turn necks, I’m seeking perfection, and cases that won’t clean up with a .0015 cut don’t belong in the program. Also, since I’m not taking all that deep of a cut, I haven’t seen brass life suffer any by the 100% cleanup either. With my brass prep/brass care/reloading regimen, I get superbly long case life with these 100% cleaned up necks, even in factory chambers.
And of course, with really good brass, like Lapua, it shouldn’t take a cut of more than about .001 to clean up most of them nearly 100%.
Caution When Neck Turning For Non Bushing Dies
With traditional sizer dies, utilizing an expander button, it is entirely possible to cut necks too thin. To the point that the die won’t properly size the neck anymore. Exactly what dimension will work, depends on the die, and they vary. Generally, you don’t need to worry about this if just “cleaning up” necks for a non-tight neck chamber. If turning for a tight neck, it’s much more likely to bite you in the butt. I only use bushing style dies with turned necks, which renders this a complete non-issue for me.
Cutter Adjustment
Okay, we know our starting o.d. And we’ve decided what we want our final loaded o.d. To be, which tells us how much thickness we want to remove, or how deep of a cut we want to make. So, we need to adjust the cutter on our tool to the precise depth of cut that will give us the precise final O.D. we want.
You’ll want to follow the instructions for your particular tool to get the cutter depth set. In general, the procedure will look something like this:
- Back the cutter off far enough to allow a case easily onto the mandrel.
- Turn in the cutter far enough to just touch the case
- Take the case off, move the cutter in a bit more
- Turn the neck of a test case
- Measure
- Repeat as necessary to get adjustment correct
My advice is to “sneak up” on the final adjustment. Make the first adjustment to get close, but not quite there. Make a very tiny adjustment in, turn another case, measure. Repeat. The K&M tool I use is among the easiest to adjust within a ten thousandth of the desired setting. Some tools will take a lot of trial and error to get there though.
The Dreaded Doughnut
Your neck turning tool will have at least one other adjustment besides the depth of the cutter and that is adjustment for how much of the neck is turned. This is typically accomplished by adjustment of the position of the shoulder on the turning mandrel to act as a stop for the case.

The so called dreaded doughnut occurs when the cut is not run all the way into the shoulder of the case.

The illustration above represents the shoulder and neck of a case before neck turning.
The illustration below represents after neck turning but stopping the cut short of the shoulder.

And here is a case that has been neck turned to show what the above illustration looks like on a real case.
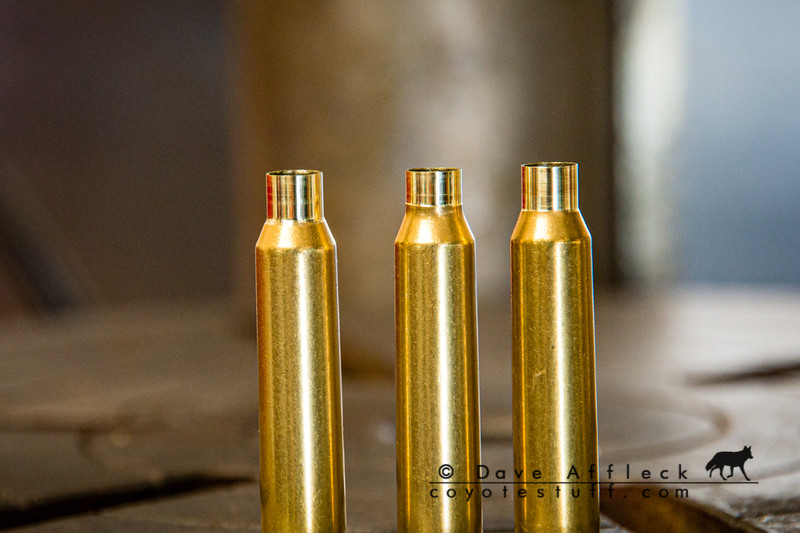
So, you can see that not turning the neck all the way down to the shoulder will leave a step where you stopped turning and the uncut brass remains. Upon firing, the outside of the case will conform to the chamber walls and that step will be transferred to inside the neck.
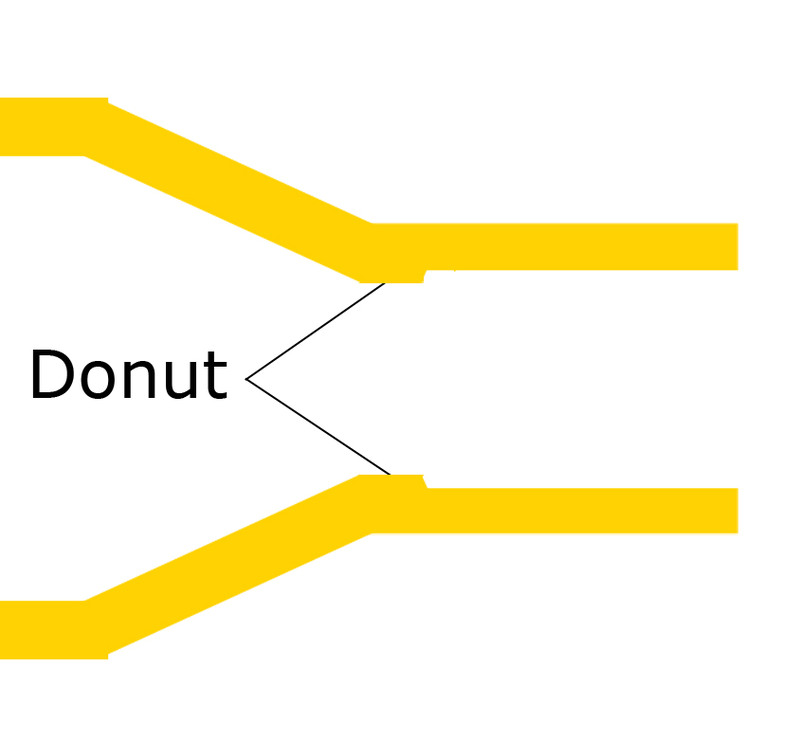
That step, now on the inside of the neck is the Dreaded Doughnut. If you are seating bullets deep enough that the shank of the bullet is passing through the doughnut, that step will be be ironed back to the outside before firing again.
In a tight neck chamber, this can be disastrous. In a non tight neck, it probably isn’t dangerous but it sure is crappy for accuracy!
So, we never want to create the dreaded doughnut. Fortunately, it is easily avoided. All you have to do, is be sure to run the cutter into the shoulder, as illustrated below.

And a real case turned as illustrated above.

When cut into the shoulder as above, the result when fired is as below.

The step, or doughnut, such as it is, gets transferred into the shoulder, below the neck, where it can’t and won’t interfere with bullet seating.
To set the tool to make this kind of cut, I employ a stupid easy method. I simply set the shoulder of the mandrel low enough that the mouth of the case can’t actually reach it.

Now, this is not how any of the instructions that come with any neck turning tools are going to say how to make this adjustment. Just about everything I have ever read on the subject talks instead about being careful not to cut too deep into the shoulder. And so being very careful and critical in setting the mandrel shoulder to stop the case at precisely the just right spot where doughnuts won’t form but you aren’t cutting too deep into the shoulder. Note, that to maintain a precise location on the shoulder with this method, all of the cases must be trimmed to exactly the same length.
This is all fine. I’ve no argument with doing it that way. I just don’t, is all. Instead, I adjust so the case mouth can’t bottom out on the shoulder of the mandrel. And then I just run the case on until the cutter bottoms out into the shoulder.
If you are going to bottom the cutter into the shoulder as I do, you’ll want a cutter with at least as much relief angle on it as the shoulder angle of the case you are neck turning. Most makers of quality neck turning tools offer cutters of different angles to accommodate various shoulder angles. Note the cutter above has a 40 degree relief for use with Ackley cases but works just as well with standard cases as shown.
I understand the concern with cutting too deep into the shoulder. Particularly when turning for thin necks as in bench rest applications. And if you are unsure, play it safe and follow the tool manufacturer directions.
But, for my chambers, the thickness of my necks, it’s just simply not a concern. I have never, had any problem, what so ever, of any kind, resulting from just bottoming the cutter into the shoulder.
And, I’ve never had a dreaded doughnut form either. So, it works for me.
Lube Mandrel
Proper lubrication of the cutting mandrel is critical to getting excellent results in neck turning. The case neck should fit fairly tight on the turning mandrel. Without good lube, you can get brass building up on the mandrel which can make for more effort and less consistent results.
I have tried quite a few different lubes over the years. Here are some of them.
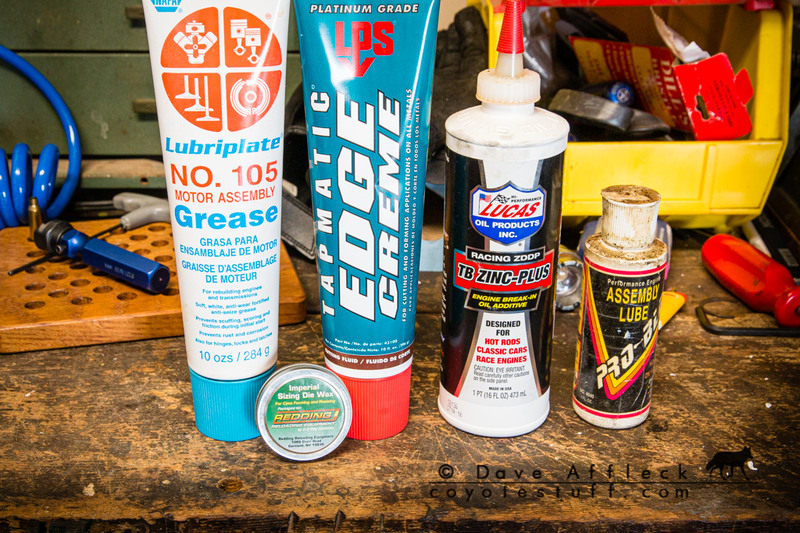
All of the products shown above work as do many others I’m sure. But for me, the Tapmatic Edge Creme works the best in my system. I have never had any brass build up at all using it, even at 500 RPM in the drill press using a tool steel cutting mandrel. I put some in a small cup and apply it to the mandrel with a Q-tip.
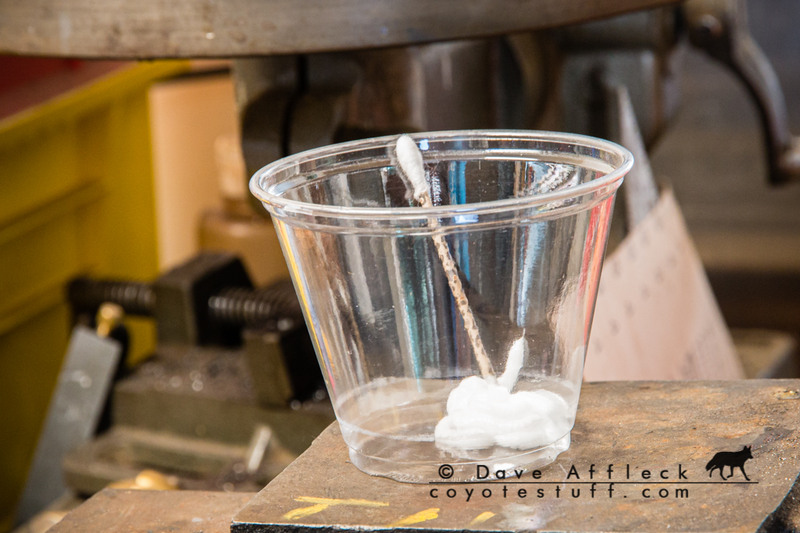
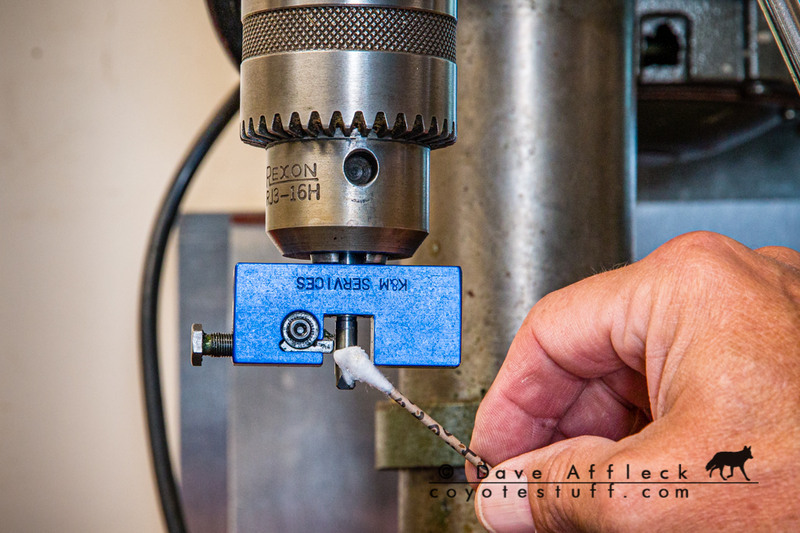
When using the drill press, I apply fresh lube every other case. I don’t stop the drill press, I just reach in and put some on the mandrel with a Q-tip while it’s spinning.
Double Check O.D. of Final Adjustment
With all of your final adjustments made, turn a case, seat a bullet and check O.D. One more time just to make sure you are precisely where you want to be, before proceeding to turn the rest of the batch.

Neck Turn Rest of Cases!
Once all the final adjustment has been made and you are happy with the final O.D. It’s time to go ahead and turn all of the cases in the batch. I like to stop and re-check O.D. After about ten cases and again after about fifty, just to make sure my depth adjustment hasn’t shifted at all.
But from here out, it’s a production run. This is where the drill press really shines. Not only does it power the operation but it also acts as a third hand. Below is a short video I made quite a few years ago showing how I neck turn cases in the drill press. It’s an old, low resolution video, but nothing in my process has changed since then.
Wrap Up
And that my friends, is about all I’ve got on neck turning! If you have any questions or comments, I’d love to hear them, just use the form below here and I’ll get back to you as soon as I can.


Thanks for sharing your techniques.
My pleasure Weasel!
Dave, amongst your many other talents, you’ve sure got a knack for clear & concise tutorials! This short series on neck turning is, IMHO, ‘required reading’ for any reloader…
Thanks Fred. I really appreciate that!
Dave,
When you say “sort” your brass I assume you mean by weight. If so what are your full parameters?
I would also like to know more about your “brass care” and “reloading regime”.
Thanks
Miles
Miles, in this context, when I say “sort”, I mean by neck thickness variation. Typically, I would cull any piece of brass with more than .0015 neck thickness variation – before neck turning. The eccentricity only gets worse in the case body going towards the head. For a rifle that I’m going to go to the trouble of turning case necks for, that brass doesn’t cut it and I don’t use it.
My brass care and reloading habits would make for a lengthy post! To go into not just the what and how, but the why. In the context of an accurate bolt action rifle though, it breaks down something like:
– Neck turned cases in tight neck chambers
– Neck sizing with bushing style dies without expanders and without need of case lube
– Shoulder bump with a body die only when needed and for some rifles that is never
– I don’t often weigh charges, loading by volume instead
– I don’t usually have to trim for the life of the brass/barrel
– I only clean the necks, never tumble or anything like that
– The only way brass ever “wears out” like this is primer pockets getting loose
Turning the case necks is a key component of making this system work. But it allows for great ease of loading – no lube, no tumbling, no trimming, etc., gives superb accuracy and very long case life.
Dave,
What do you consider as enough brass to wear out a barrel? The math is easy. Barrel life ÷ reloads per case. What numbers do you use?
Also, in one of your articles I read you never trim cases, is that still true? What about annealing?
Miles, yes, exactly – it’s math. Two parts, as you’ve described, how many rounds I expect the barrel to last divided by how many loadings I expect to get out of each case.
I have worn out several factory and custom .22-250 barrels and .22-250AI barrels and for those, 200 cases are sufficient.
For something like a .223, it would take a lot more cases than that as the barrel is going to last a lot longer – I haven’t worn out a .223 barrel yet.
I started my .17 Mach IV and .221FB with 500 cases each.
For something like my 6/284, though I started it with 200, I won’t be surprised if 100 will end up having been enough brass to wear out that barrel.
One of the final steps I take in load work is to load a single piece of brass over and over with my final working load and see how many loads it will take to loosen up the primer pocket. How many I consider acceptable depends on the application. For my .17 Predator, for instance, I’m okay if I only get 8 or 9 loads out of a piece of brass. For a .22-250 I want to see more like 15 loads. If I can’t get the number of loads I’d like out of a piece of brass, I either need to rework my load for less pressure, or use more brass. I usually opt to rework the load for less pressure.
I have brass for my .22BR’s that have been loaded 40 – 50 times and are still going strong. For those rifles, with that brass, I could probably wear one out with only 50 pieces of brass if I wanted to try! But since those are colony varmint rifles, I like to have 200 pieces of working brass for each of them anyway.
Annealing… I only do it as needed. With the minimum working that my brass sees, neck turned, tight neck chamber, no expander in the die, minimum spec chamber etc., I usually don’t ever need to. But, if I note some variation in seating force needed, I’ll anneal. And of course, annealing is often required, or at least a very good idea while forming wildcats where there is a lot of brass working and moving. But this is typically a one time operation on new brass during the initial forming operation.
Thanks for your time and informative answers.
Great tutorial – Thanks for sharing this. Quick question – Is the cutter bi-directional or do you need to pay attention to the direction the tool is spinning in the drill press?
Ben, the cutter is not bi-directional. The normal drilling rotation of a drill press is the correct direction.
Thank you Weasel. That was very informative.